Homemade Strawberry Ice Cream: Simple, No-Cook, and Better Than Store-Bought
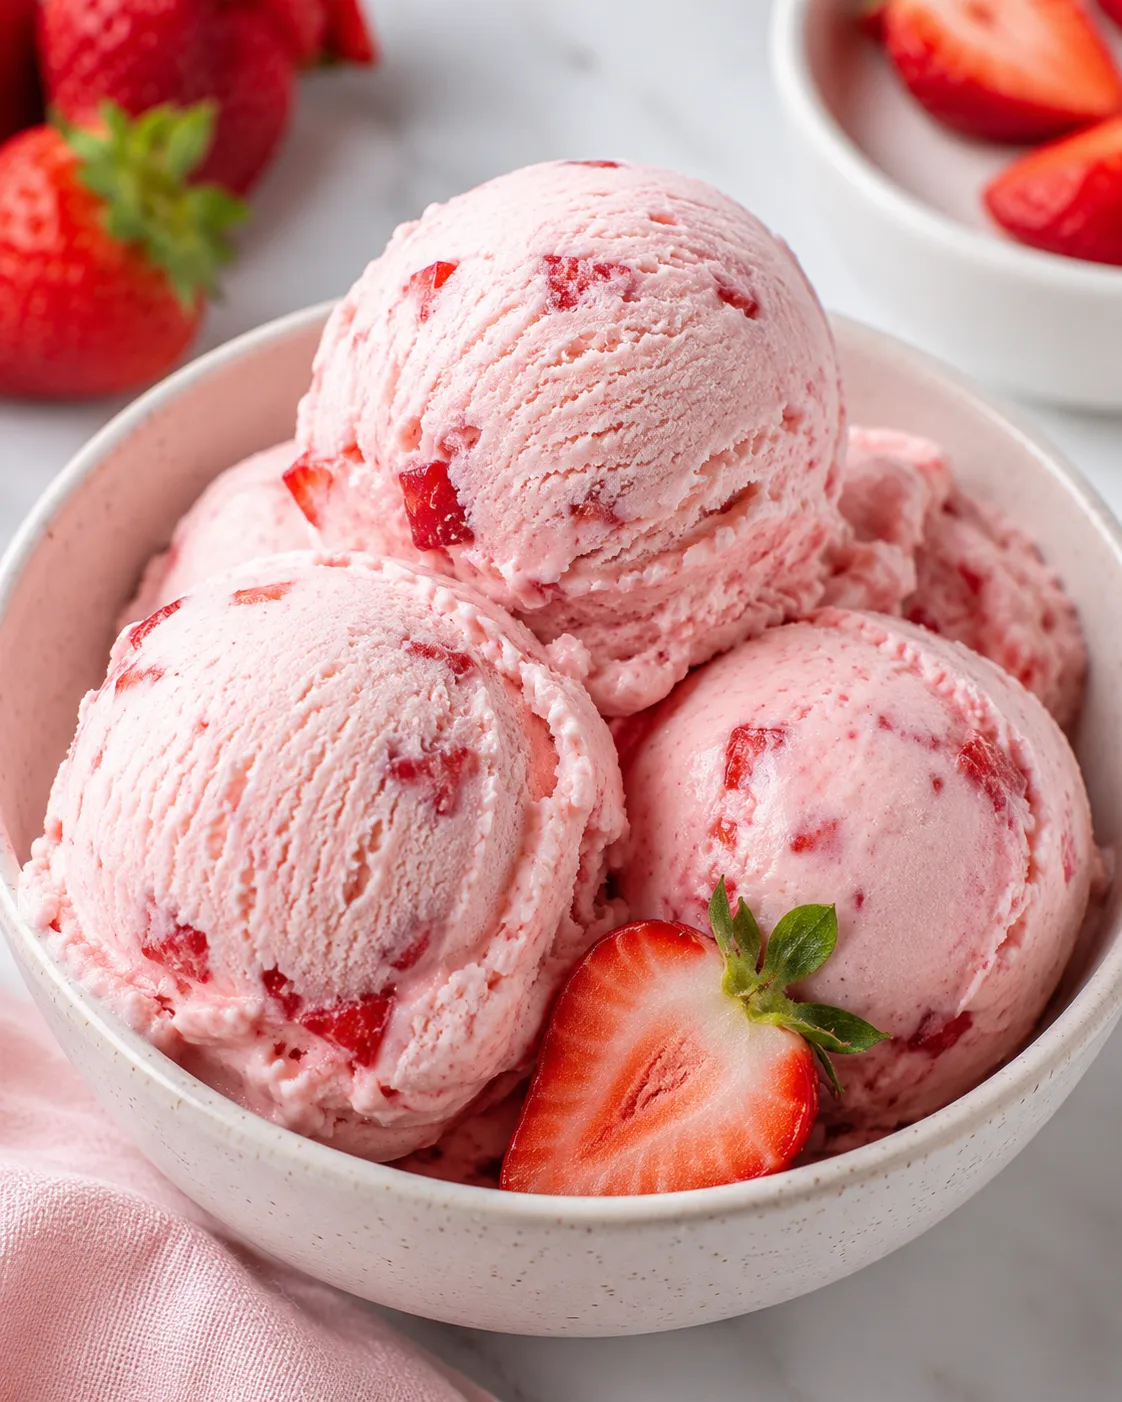
There’s something almost nostalgic about a bowl of strawberry ice cream — that soft pink color, the little flecks of real fruit, the way it manages to be both rich and refreshing at the same time. This homemade version captures all of that with a recipe that’s far simpler than most people expect. No custard base to cook, no eggs to temper, no risk of scrambling anything on the stove. Just fresh strawberries, cream, milk, sugar, and a little patience while it chills and churns.
If you’ve ever assumed homemade ice cream was too fussy for a regular weekend project, this recipe is the one to change your mind.
Why This No-Cook Method Works So Well
Traditional ice cream recipes often start with a custard base — egg yolks cooked slowly with cream and sugar until thickened, then cooled before churning. It produces a wonderfully rich result, but it also introduces more room for things to go wrong: overcooked eggs, a base that curdles, extra dishes, extra time.
This recipe skips all of that by using what’s often called a “Philadelphia-style” base — cream and milk sweetened and flavored directly, without eggs. It’s faster, simpler, and nearly foolproof, and because strawberries are already bringing so much flavor and natural sweetness to the mix, you don’t lose much by skipping the custard step. What you get instead is an ice cream that tastes distinctly fruit-forward, letting the strawberries actually shine rather than getting buried under a heavy egg-based richness.
The other key technique here is macerating the strawberries before they go into the base. Tossing chopped strawberries with sugar and letting them sit draws out their natural juices through osmosis, concentrating their flavor and creating a bit of natural strawberry syrup that gets folded into the cream base. This step is short, but it makes a real difference in how vibrant the finished ice cream tastes.
Why Homemade Beats Store-Bought
Most store-bought strawberry ice cream leans heavily on artificial strawberry flavoring, food coloring, and stabilizers to keep its texture and color consistent on a store shelf for months at a time. The result is often a flavor that reads as “pink and sweet” rather than actually tasting like strawberries.
Making it at home flips that completely. You control exactly how much real fruit goes in, how sweet it is, and how rich the base is. There’s also a textural payoff — homemade ice cream, especially one made without excessive stabilizers, tends to have a cleaner, creamier mouthfeel, along with actual bits of real strawberry in almost every bite instead of a uniform, artificially flavored base.
Ingredients You'll Need
2 cups fresh strawberries, hulled and chopped
¾ cup granulated sugar, divided
2 cups heavy cream
1 cup whole milk
1 tsp vanilla extract
⅛ tsp salt
Every ingredient here has a clear job. The strawberries provide the primary flavor and that natural pink color, no food coloring needed. The sugar is split into two portions — half to macerate the strawberries and pull out their juice, half to sweeten the cream base itself. Heavy cream is what gives the ice cream its richness and helps it churn into a smooth, scoopable texture rather than an icy one, while whole milk lightens the base just slightly so it doesn’t turn overly dense. A touch of vanilla rounds out the flavor without competing with the strawberries, and the small pinch of salt — easy to skip, but worth including — sharpens all the other flavors and keeps the ice cream from tasting flat or one-dimensional.
Step-by-Step Method
Step 1: Macerate the strawberries. In a bowl, mash the chopped strawberries with half of the sugar, about 6 tablespoons. Let the mixture sit for 15 to 20 minutes. During this time, the sugar will draw moisture out of the strawberries, creating a syrupy, deeply flavored strawberry mixture that’s the backbone of the whole recipe.
Step 2: Make the cream base. While the strawberries macerate, whisk together the heavy cream, whole milk, the remaining sugar, vanilla extract, and salt in a separate bowl until the sugar has fully dissolved. You shouldn’t feel any graininess when you rub a bit of the mixture between your fingers.
Step 3: Combine strawberries and base. Stir the macerated strawberries, along with all of their released juices, into the cream base. Don’t discard any of that liquid — it’s concentrated strawberry flavor and it’s exactly what gives the finished ice cream its color and taste.
Step 4: Chill the mixture. Cover the bowl and refrigerate for at least 2 hours, or until the mixture is very cold — ideally closer to 40°F. This step matters more than people expect: a properly chilled base churns faster and results in a smoother, creamier final texture, since it has less work to do inside the ice cream maker.
Step 5: Churn. Pour the chilled base into an ice cream maker and churn according to the manufacturer’s instructions, typically around 20 to 25 minutes, until it reaches a thick, soft-serve consistency.
Step 6: Freeze until firm. Transfer the churned ice cream into a freezer-safe container and freeze for at least 4 hours, until it’s firm enough to scoop properly. It will continue to develop that classic scoopable texture as it hardens.
No Ice Cream Maker? No Problem
You don’t need a dedicated machine to make this recipe work. Pour the chilled base into a shallow, freezer-safe dish instead of an ice cream maker. Place it in the freezer, and every 30 minutes, take it out and stir vigorously with a fork, breaking up any ice crystals that have started to form around the edges. Repeat this process for about 3 hours, until the mixture becomes thick, creamy, and scoopable. It takes a bit more hands-on effort than using a machine, but it produces a genuinely good result if that’s what you have available.
Tips for the Best Texture
A few small habits make a real difference in how this ice cream turns out.
Don’t skip the maceration step. It only takes 15 to 20 minutes, but it’s where a huge amount of the strawberry flavor actually develops.
Chill the base thoroughly before churning. A warm or even room-temperature base will churn more slowly and often results in a coarser, icier texture.
Use ripe, in-season strawberries when possible. The better the strawberries taste on their own, the better this ice cream will taste — there’s no way to fake a great strawberry flavor with underripe fruit.
Don’t over-churn. Stop once the mixture reaches a soft-serve consistency. Over-churning can start to separate the butterfat in the cream, resulting in a grainy texture instead of a smooth one.
Let it soften slightly before serving. Homemade ice cream, without the stabilizers found in store-bought versions, tends to freeze harder. A few minutes on the counter before scooping makes it much easier to serve.

You must be logged in to post a comment.